
College campuses are full of underused rooftop space, but a solar project only succeeds when structure, roof condition, array layout, safety access, and long-term maintenance are thought through together. At an art college in China, YURI POWER designed and delivered a rooftop photovoltaic system of about 1.56 MW across multiple buildings. This article follows the delivery from survey to live operation, stage by stage, with real project photos.
The Site: An Art College with a Large Rooftop Resource
Campus buildings combine two things solar projects need: large, relatively flat roof areas and daytime electricity demand that matches solar output. Lecture halls, dormitories, and studios run through the middle of the day, when generation is highest — which means a rooftop array supplies energy exactly when the campus uses it, with less reliance on the grid and less surplus to manage.

But a campus roof is not an empty field. The building structure, the age and condition of each roof, and the position of parapets, skylights, HVAC units, and drainage all shape where panels can go. YURI POWER surveyed several campus buildings before any design began, so the delivery plan started from what each roof could actually support.
The Delivery Workflow at a Glance
Every rooftop solar project passes through the same delivery stages, and this one was no different. The workflow below shows the full path from first visit to long-term operation.
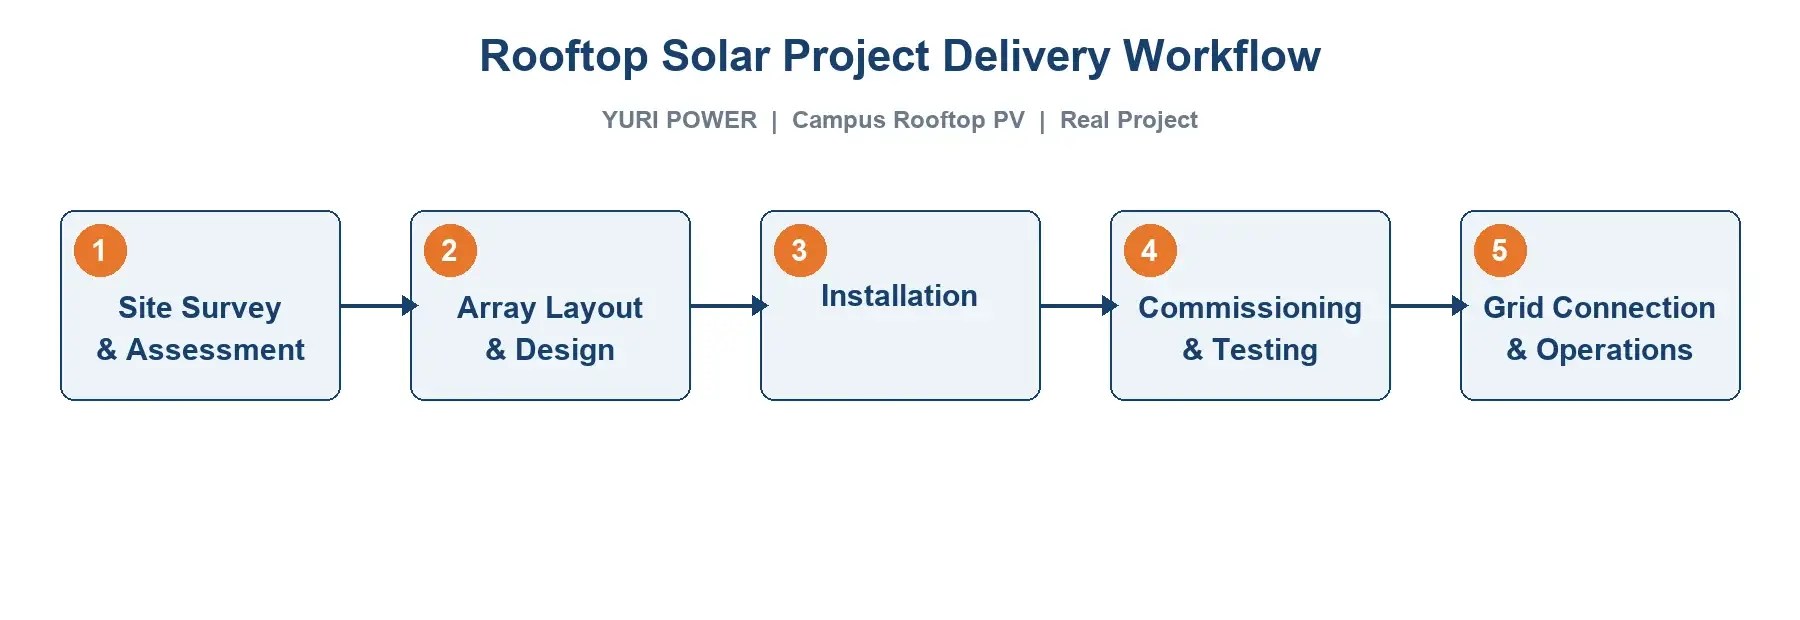
– Stage 1 — Site survey and assessment: inspect structures, roofs, and existing conditions.
– Stage 2 — Array layout and design: position panels, plan cabling and access.
– Stage 3 — Installation: mounts, modules, inverters, and electrical wiring.
– Stage 4 — Commissioning and testing: energise the system and verify performance.
– Stage 5 — Grid connection and operations: connect to the network and manage the system over time.
The sections below walk through each stage as it was delivered on site.
Site Survey and Assessment
The survey is where delivery is decided. YURI POWER engineers inspected every roof in scope, checking structural capacity, roof waterproofing, load limits, and the orientation and shading of each surface. They identified which buildings could host an array, where panels could not go, and where walkways and maintenance access had to be preserved for campus staff.

Two things mattered more on a campus than on an industrial roof: safety access and aesthetics. With students and staff moving around every day, the survey paid particular attention to edges, cable routing away from pedestrian areas, and keeping the visible installation neat across the block. The result was a clear map of what could be built where, before a single panel was lifted onto a roof.
Installation: From Empty Roof to Array
With the layout fixed, installation began. The sequence is always the same: mount the racking on the roof, fix the modules to it, run the DC cabling down to the inverters, and connect the inverter output to the campus distribution system.
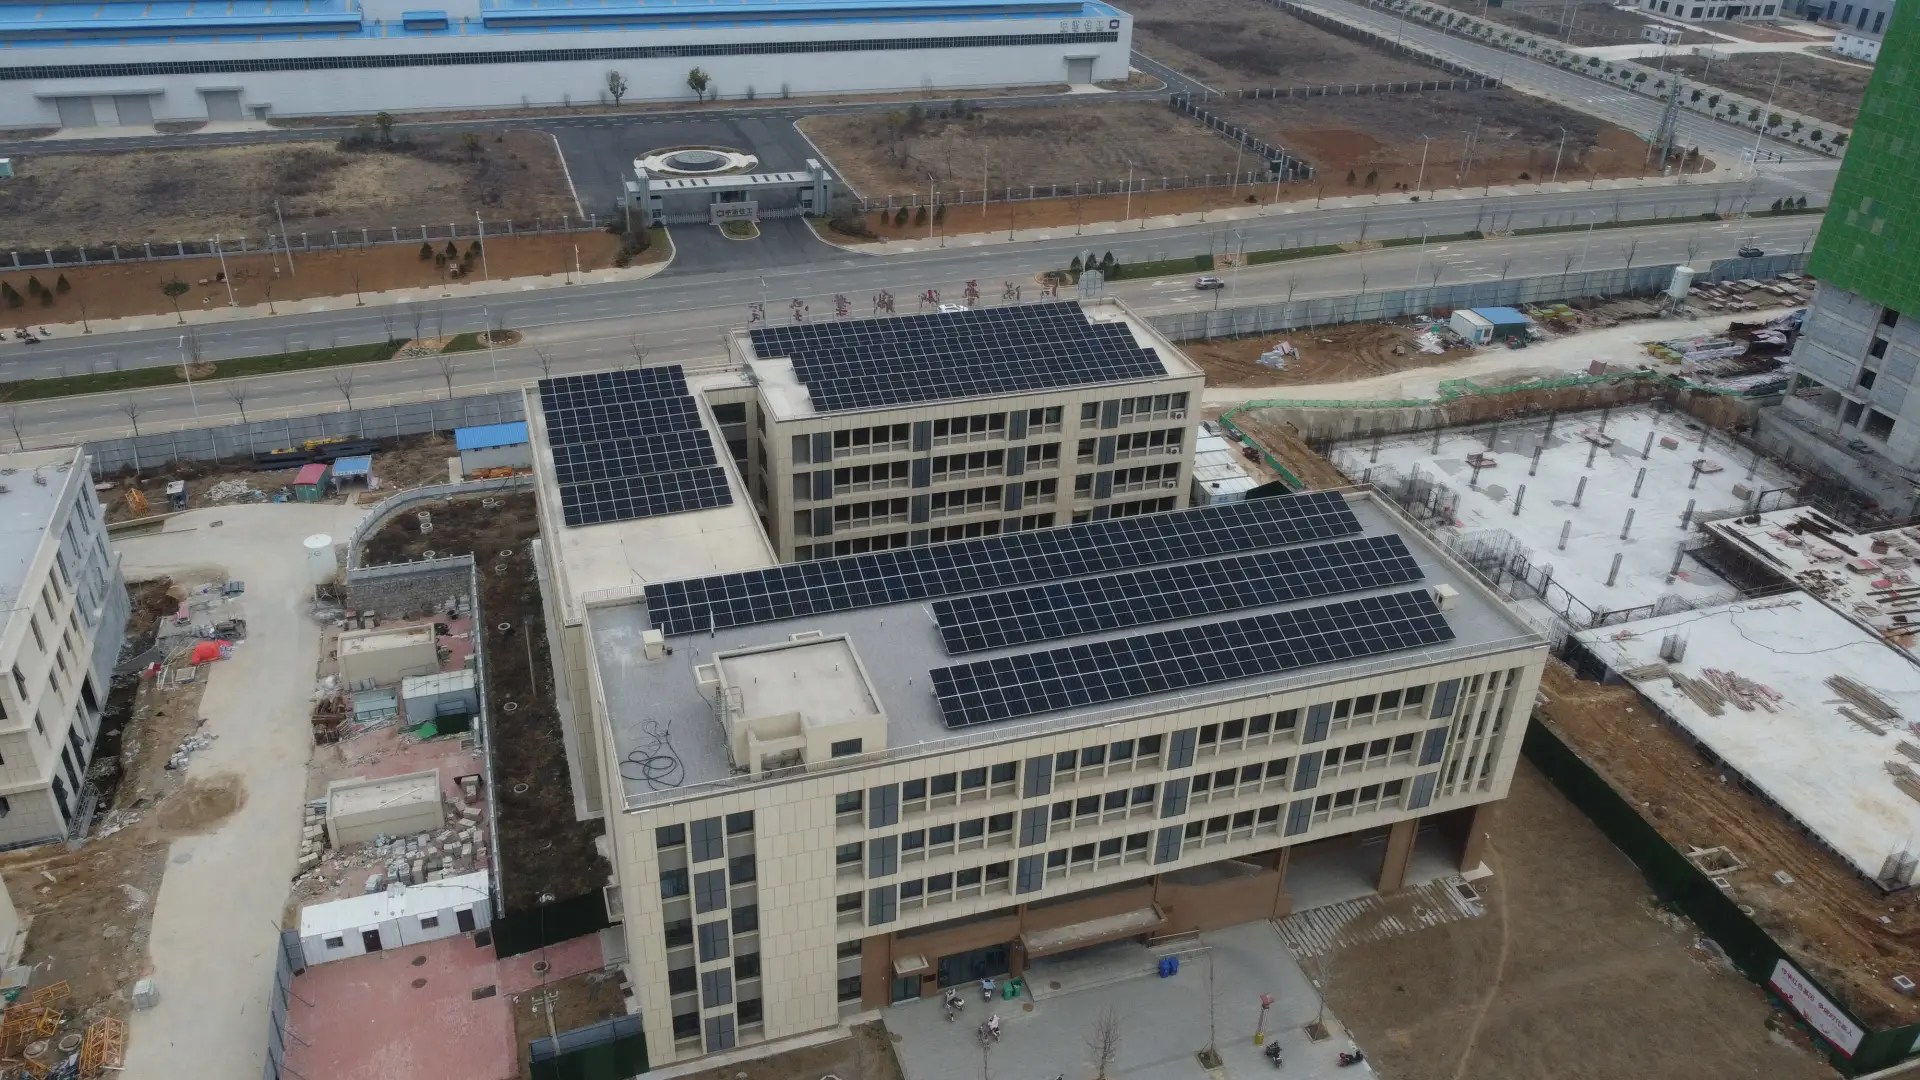
On a campus, installation works around daily life. Roofs are scheduled one at a time so classes and foot traffic continue uninterrupted. The mounting system is anchored carefully to protect the roof membrane, and cable runs follow the routes defined during design. Because the layout was settled at survey stage, the team installed with minimal rework — the difference between a well-planned job and one that stalls on the roof.
Commissioning and Grid Connection
When the final module was in place, the system moved into commissioning. Each string was tested for continuity and insulation, the inverters were energised, and the system was checked against its design expectations. A rooftop project is only finished when it is safe to run and safe to maintain, so the commissioning stage also walked through access, isolation points, and emergency shutdown with the campus facilities team.
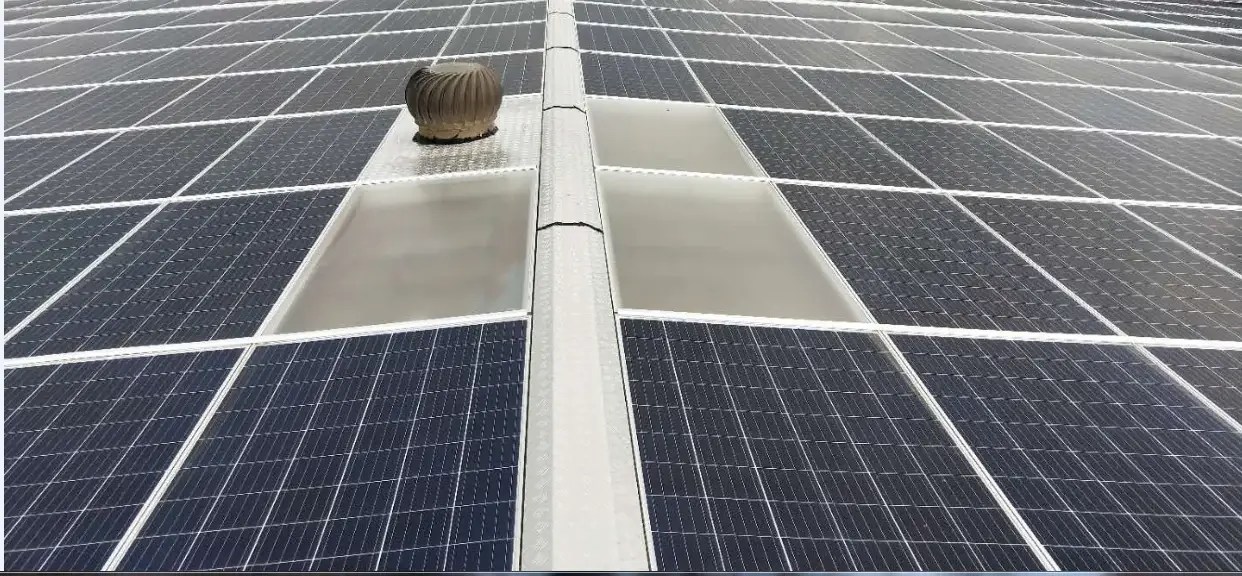
The completed array now sits on the campus rooftops, connected to the building’s electrical system. The project handed over with the standard operating and maintenance documentation — what to check, how often, and who to contact — so the campus team can keep the system running for decades rather than treating the handover as an endpoint.
Operating and Maintaining the System
A rooftop solar system earns its keep over time, and operations are as much part of the delivery as the installation. Routine inspection covers panel condition, cleaning schedules, inverter performance, and the integrity of cabling and connections. Because the system feeds on-site loads directly, performance is visible in the campus electricity bill — which is the metric that matters most to a client.
For YURI POWER, the project demonstrated the full delivery capability in one place: survey, design, installation, commissioning, and handover on a live, occupied campus. That is the point of a real project photograph over a rendering — it proves the process works with the site conditions and daily operations of an actual building.
FAQ
Q: How large is this campus rooftop solar project?
A: The system is about 1.56 MW, spread across multiple buildings on an art college campus in China.
Q: What does a rooftop solar delivery involve?
A: A rooftop delivery covers site survey and assessment, array layout and design, installation, commissioning and testing, and grid connection with ongoing operations and maintenance.
Q: Why are campus rooftops good for solar?
A: Campuses have large, relatively flat roofs and daytime electricity demand that matches solar output, so the energy is consumed on site when it is generated.
Q: How does installation work on an occupied campus?
A: Installation is planned roof by roof around class schedules and daily traffic, with cable routes and access defined during design so the live campus is not disrupted.
Q: What happens after the system is connected?
A: The system is handed over with operating and maintenance documentation, and YURI POWER provides ongoing inspection covering panel condition, cleaning, inverter performance, and cabling integrity.
YURI POWER Engineering Team · August 31, 2026